Tektronix Oscilloscope FFT, the 2236, and a Starrett Micrometer: Know Your Scenario
Posted on 2026-08-19 by Marcus Feld
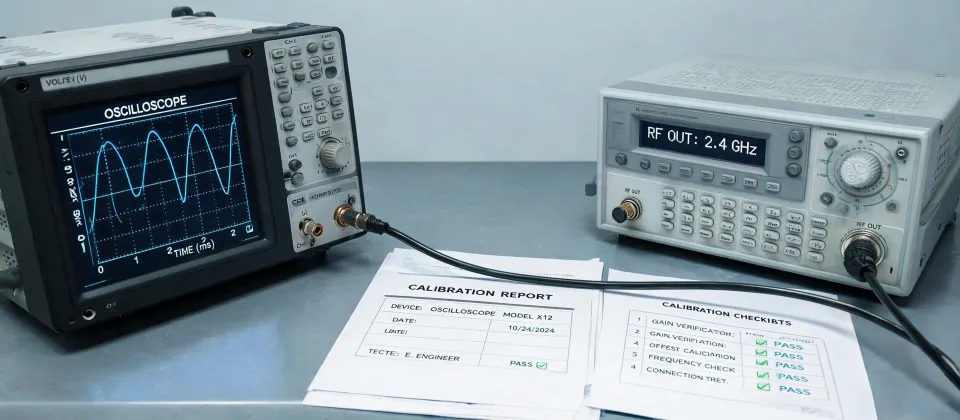
No single “best” Tektronix oscilloscope: know your scenario
I’ve spent nine years handling test equipment and sensor troubleshooting orders for an industrial electronics team. I’ve personally made—and documented—14 significant measurement mistakes, totaling roughly $6,000 in wasted budget. The most expensive one? It wasn’t a broken scope. It was a scope that was the right model for the wrong scenario.
So before you search “which Tektronix oscilloscope should I buy,” ask which of these you’re actually doing:
- You need to see frequency content—a Tektronix oscilloscope FFT setup.
- You’re trying to decide whether a Tektronix 2236 oscilloscope is still worth bench space.
- You’re testing an inductive proximity sensor M30 x 1.5 and need to verify both the switching waveform and the physical thread size.
These are different problems with different answers.
Scenario 1: You need Tektronix oscilloscope FFT
Modern digital Tektronix scopes have an FFT option in the Math menu. Current Tektronix user documentation lists it there—tektronix.com, accessed January 2025. That’s convenient, but it’s also a trap. The FFT on an oscilloscope is a math function, not a spectrum analyzer. I learned that after chasing a nonexistent harmonic for a day because I used a rectangular window on an amplitude-ramping signal.
The idea that FFT was only possible with a dedicated spectrum analyzer was true 30 years ago when digital scopes cost a fortune. Today, a standard Tektronix scope can do much of that work. But for most ripple and noise checks, I now stick to a few rules:
- Use 5 to 10 times the highest frequency you care about. Nyquist is the floor, not the target.
- Pick the window with intention. Hanning or Flattop for most repetitive power measurements; rectangular only for pure tones.
- Give the FFT a longer time record. More memory equals better frequency resolution.
- Set the vertical scale after the FFT is displayed, not before. Otherwise you’ll miss the peak.
On a current Tektronix scope, press Math, then select FFT. Pick the source channel, choose the window, and then adjust the span by changing the horizontal scale. If you see a big peak at 0 Hz, that’s DC offset, not a real harmonic. Use AC coupling to remove it.
The old assumption that you can just “press FFT and read the peak” was probably never true. Today’s scopes are better, but they still need a person who understands sample rate and windowing. If the price of a scope is your main concern, you may end up with a modern scope that has FFT but bad probes or no calibration. That is a worse investment than an older, simpler scope used for the right task.
A cheap probe or an uncritical FFT setup will waste far more engineering time than it saves.
Scenario 2: The Tektronix 2236 oscilloscope
The Tektronix 2236 is an analog 100 MHz, two-channel oscilloscope with a built-in digital multimeter and counter/timer. According to the Tektronix 2236 operator manual, the built-in DMM is a 3.5-digit meter, and the counter is useful on a basic bench. I bought one after a project in 2022 because I needed a second scope for simple line-frequency checks. I never expected that 1980s-era tool to still be useful. Turns out, for basic waveform viewing, it is.
But here’s the honest part: the 2236 has no FFT. It can’t do math on waveforms. An analog oscilloscope doesn’t digitize the signal for FFT. People think old analog scopes are “purer” for FFT because they avoid digitizing artifacts. Actually the relationship is reversed: FFT requires digitizing. So when someone asks if an old 2236 can replace a Tektronix oscilloscope FFT setup, the answer is no. That’s not a knock on a classic; it’s physics.
If you have one or are buying one, check calibration first. Look for a calibration sticker and test the time base against a known frequency. A 40-year-old scope that hasn’t been calibrated is not a bargain. It’s a budget tax. Keep it in the role it can handle: basic live waveform, timing checks, and the built-in meter.
Scenario 3: Inductive proximity sensor M30 x 1.5 and how to read a Starrett micrometer
This one involves no expensive spectrum analysis. I once spent a rainy Wednesday watching a machine not detect parts. The sensor was an inductive proximity sensor M30 x 1.5, and the output signal looked okay on my multimeter. But when I put a Tektronix oscilloscope on the signal wire, the pulse was there—yet the duration of the output was not stable. That caught the intermittent sensor failure.
Now the mechanical side: M30 x 1.5 means a 30 mm nominal thread diameter and a 1.5 mm thread pitch. Thread pitch is not something a micrometer can check. A micrometer measures distance, not spacing. It checks the major diameter. Before you rely on my micrometer explanation, I’ll admit: I’m not a metrology expert. I can’t talk about calibration standards. What I can tell you from an engineering bench perspective is this.
If you’re wondering how to read a Starrett micrometer, here’s the short version:
- Leave the faces clean and close the micrometer gently with the ratchet stop.
- Read the sleeve. Each numbered line on an inch-reading Starrett is 0.100 in, and each small division is 0.025 in.
- Read the thimble where it aligns with the sleeve index. Each thimble division is 0.001 in.
- If it has the vernier scale, add the matching line, typically 0.0001 in.
A metric Starrett works the same way but reads in 0.5 mm on the sleeve and 0.01 mm on the thimble. For an M30 sensor, use a 25–50 mm metric micrometer.
In 2017, I checked the major diameter, saw 29.9 mm, ordered a replacement sensor, and skipped the thread pitch gauge. The result was two days of downtime and a $210 wrong-pitch sensor sitting in a drawer. My checklist now says: “OD verified, pitch gauge confirmed, cable length known.”
How to choose what you actually need
Look, I’m not going to tell you that an expensive Tektronix FFT-capable scope is always the right call. It isn’t. And I’m not going to tell you that a vintage 2236 is a hack that will solve everything. It won’t. The value is in matching the tool to the scenario.
- Need frequency content and spectral peaks? Use a modern digital scope with FFT and decent probes.
- Need basic time-domain signals on a small budget? A calibrated 2236 can still earn its place.
- Need to verify an inductive sensor’s timing and thread? Use an oscilloscope for the pulse and a Starrett micrometer plus thread pitch gauge for the mechanical fit.
The cheapest option is not the lowest purchase price. The cheapest option is the one that gives you the correct answer without a second trip, a failed test, or a downtime call. I’ve paid that hidden cost too many times. The tools you use should fit the task, not just the budget.
Marcus Feld
Marcus Feld is an electrical test and measurement analyst specializing in multimeters, oscilloscopes, clamp meters, insulation testers, spectrum analyzers, and data loggers. He applies IEC 61010-2-030 and IEC 61010-031 concepts while examining measurement category, bandwidth, true-RMS response, input loading, and stated uncertainty. His work helps maintenance engineers and test teams choose safe instruments with performance suited to the signals and environments they actually measure.
Leave a technical comment